The AeroPress blends traditional immersion brewing with pressure-driven extraction. It’s like a blend between using a traditional French press and an espresso machine.
The coffee this device produces is remarkably smooth and rich — and it only takes a minute to brew.
The lightweight design makes the AeroPress ideal for both home and travel use. The newly released AeroPress GO is optimized for travel/camping. Everything neatly fits into a lightweight self-enclosed container that doubles as a mug.

Aeropress Brewing Specs
- Brew Time: 2 minutes
- Coffee/Water Ratio: 1:7
- Grind: Fine (like sand)
- Water Temperature: 208ºF (98ºC)
-
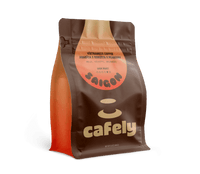
Recommended Coffee: HaNoi, Saigon OG
AeroPress Step Summary
- Measure & Grind your Coffee
- Prepare your AeroPress by adding a filter & placing it over your mug
- Pour hot water, stir, & count to 30
- Press down on the plunger to extract your coffee
- Sweeten your coffee to taste
Tools You’ll Need
To brew coffee using an AeroPress, you’ll need the following items/ingredients:
- Aeropress — Available in three sizes (Go, Original, & XL).
- Aeropress Filters — The AeroPress requires proprietary filters that fit snugly in the filter cap. Alternatively, you can buy a reusable metal filter.
- High-Quality Coffee — Opt for freshly roasted espresso-style arabica or a Vietnamese robusta for a strong but not overly bitter cup of coffee.
- Coffee Grinder — A burr grinder will provide the best grind consistency, but a blade grinder or a small blender will do the trick too. Aim for a fine grind with a coarseness similar to sand.
- Hot Water — For AeroPress press brewing, you’ll want to opt for a ratio of around 1:7 coffee to water. The total amount of water will depend on the size of your press.
- Timer (Optional, but Recommended) — The AeroPress brews quickly, sometimes too quickly. If you aren’t paying attention, it’s easy to over-extract your coffee. A timer prevents this from happening.
Step-By-Step Instructions: AeroPress
Here’s a simple process for brewing coffee using an AeroPress.
Step 1: Measure & Grind the Coffee

Grind your beans to a medium-fine or fine grind (similar consistency to sand).
If you don't have a grinder, you can order pre-ground coffee and skip this step entirely.
The amount of coffee you’ll need depends on which AeroPress model you have and the style of coffee you want to make (chart below). The AeroPress is very versatile.
AeroPress Coffee to Water Ratios:
|
AeroPress GO (Small) |
AeroPress Original (Standard) |
AeroPress XL |
|
|
American Style Coffee |
3/4 scoop of coffee (11 g) / fill water to the third line |
1 scoop of coffee (15 g) / fill water to the fourth line |
1 scoop of coffee (15 g) / fill water to the fourth line |
|
Espresso Style Coffee |
1 scoop of coffee (15 g) / fill water to the first line |
1 scoop of coffee (15 g) / fill water to the first line |
1 scoop of coffee (15 g) / fill water to the first line |
|
Latte |
1 scoop of coffee (15 g) / fill water to the first line |
1 scoop of coffee (15 g) / fill water to the first line |
1 scoop of coffee (15 g) / fill water to the first line |
|
Vietnamese Style Coffee |
1 scoop of coffee (15 g) / fill to the first line. |
1 scoop of coffee (15 g) / fill to the first line. |
1 scoop of coffee (15 g) / fill to the first line. |
|
Cold Brew |
3/4 scoop of coffee (11 g) / fill with room temperature water to the third line |
1 scoop of coffee (15 g) / fill with room temperature water to the fourth line |
1 scoop of coffee (15 g) / fill with room temperature water to the fourth line |
Step 2: Assemble Your AeroPress & Add a Filter

First remove the plunger from the bottom chamber section.
Next, remove the filter cap and place the paper (or metal) filter inside. Screw the filter cap to the bottom of the AeroPress chamber.
Place the chamber on top of your mug with the filter section at the bottom.
Step 3: Add Your Coffee & Water

Fill the chamber with the prescribed amount of coffee using the included scoop.
For a standard American-style coffee, add one scoop and fill with water until it reaches the fourth line.
For a double-shot espresso-style coffee, add two scoops of coffee and fill to the second line.
Step 4: Stir & Wait

Using the included stir tool, stir your coffee for 8–12 seconds, then let it sit for 30 seconds before moving to the next step.
If you’re making cold brew coffee, stir briskly for a full minute.
Step 5: Plunge Your Coffee

Reattach the plunger to the top of the device. Using gentle but steady pressure, push down on the plunger to force the coffee through the filter at the bottom. This should take around 30 seconds to complete.
Note: If you’re making Vietnamese-style coffee using your AeroPress, skip this step and allow the coffee to drip through the filter slowly over the course of about 5 minutes. If your coffee takes longer than 5 minutes to brew, attach the plunger to finish the job.
Step 6: Sweeten To Taste

If you’re making American-style coffee, add some milk or cream and sugar to your liking. Some people choose to touch it up with some more hot water to make a lighter, brighter brew, but this is optional.
If you’re making espresso coffee, you’re done! Drink up.
If you’re making latte coffee or cappuccinos, add steamed or frothed milk at this stage.
If you’re making Vietnamese-style coffee, you can choose to pour your coffee over ice or drink it hot. Add sweetened condensed milk at a ratio of about 2:1 coffee to condensed milk.
If you’re making cold brew coffee, add ice and enjoy, or move your coffee to the fridge overnight to cool.
Expert Tips & Tricks: AeroPress
The AeroPress is one of the most versatile brewing methods you'll find. It's easy to make a delicious cup of coffee without overcomplicating anything — but with a few simple tips and tricks, you can get the most out of this magical device.
1. Pre Heat Your AeroPress
This step is completely optional, but we find it makes a difference in the final cup.
The AeroPress doesn't offer very good heat retention, so over the course of the brew, the temperature will drop by a couple of degrees. You can avoid this by rinsing your brew chamber and mug with hot water before you start brewing.
2. Use a Fine Grind
We like to use a fine grind in our AeroPress and find this to produce the perfect extraction every time — but the official site recommends a medium-fine grind instead. We think this is because many people overdo it and grind their beans to dust. If the grinds are TOO fine, the filter will get jammed up while you push the plunger.
There should always be some pushback when pressing the plunger, but if it requires you to put your whole body weight into it to plunge, you've ground your beans too much. Dial it back for the next cup.
3. Experiment With Different Brewing Styles
Your AeroPress is more versatile than you might expect! We challenge you to try styles you haven't made before; you might be surprised by what you find.
The AeroPress can be used to make espresso-style drinks like cappuccinos and lattes, traditional Vietnamese coffee (similar to a Phin filter), and ice drip coffee.
We also recommend playing around with the coffee-to-water ratios — the instructions provided above are a great place to start, but you can easily customize your brew according to your preference. Use more water for a lighter, brighter cup and less for a stronger, bolder coffee.
4 . Rinse Your AeroPress Thoroughly Between Brews
The AeroPress is easy to clean, but there are a few crevices in which spent coffee can accumulate between brews. These residues will impart a bitter, acidic, and funky flavor to your brew, so clean all parts thoroughly between sessions.
History of the Aeropress
The AeroPress is a relatively modern addition to the coffee world — invented in 2005 by Alan Adler, an American inventor and engineer.
Adler sought a faster, more efficient way to brew a single cup of coffee without the bitterness associated with traditional methods. His invention quickly gained a following for its versatility, ease of use, and the smooth, rich coffee it produces.
The AeroPress has inspired a cult following and even its own world championship, reflecting its unique position in the coffee brewing landscape.
Best Cafely Coffees for AeroPress Brewing
HaNoi Coffee

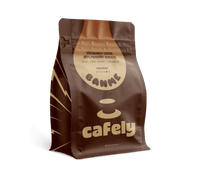
Crafted from 100% Robusta beans grown in the central highlands of Buon Ma Thuot, this coffee delivers a bold, full-bodied profile that shines in AeroPress brewing. Expect notes of dark caramel, roasted walnut, and dried date with a smooth, low-acid finish. It’s ideal for drinkers seeking a robust cup that’s smooth and flavorful without bitterness.
SaiGon OG Coffee

A bold blend of Robusta, Arabica, and Peaberry beans, SaiGon OG is medium-dark roasted for those who crave strength and complexity in every sip. Its cocoa-rich and nutty character pairs beautifully with the AeroPress’s immersion style, producing a full-bodied cup with depth and a hint of buttery smoothness. Perfect for those who want a powerful, satisfying brew.
AeroPress FAQs & Troubleshooting

1. How does the AeroPress work?
Coffee grounds and water are mixed together in the AeroPress chamber for a brief period (around 12 seconds) before using air pressure to push the mixture through a fine filter and into your cup. This process extracts flavors quickly and efficiently.
2. What type of coffee grind is best for AeroPress?
A medium to fine grind, similar in texture to table salt, is ideal and best coffee when using an AeroPress. The grind size can be adjusted to something coarser or finer based on personal preference and the specific brewing recipe you're following.
3. How long should I brew coffee in an AeroPress?
Brew time can vary from 10 seconds to 1 minute — depending on the recipe and personal preferences. Some users prefer a shorter brew time for a lighter cup, while others may extend the time for a stronger brew.
4. Can I make espresso with an AeroPress?
While the AeroPress cannot generate the same level of pressure as an espresso machine, it can produce a coffee concentrate that closely resembles espresso. This concentrate can be used as a base for espresso-style drinks like lattes and cappuccinos.
5. Is the AeroPress BPA-free?
Yes, the AeroPress is made from BPA-free plastic to ensure it's safe for brewing hot coffee.
6. How do I clean my AeroPress?
The AeroPress is very easy to clean. Simply eject the used coffee puck and rinse the plunger and chamber with warm water. The parts are also dishwasher safe, but hand washing is quick and effective.
7. Can I use regular paper filters with an AeroPress?
The AeroPress comes with its own paper filters designed to fit the device perfectly. However, some users cut regular paper filters to size or use third-party metal filters designed for the AeroPress. The performance of these DIY filters will vary. It’s important the circles are cut perfectly so coffee grounds don’t leak out the sides and into your cup.
8. What's the difference between the AeroPress & AeroPress Go?
The AeroPress Go is designed with travel in mind. It features a smaller, more compact design that neatly fits into its own mug and lid to take on the go. This device is perfect for traveling, camping, and hiking. Both AeroPress models use the same brewing process and produce coffee of the same quality.


