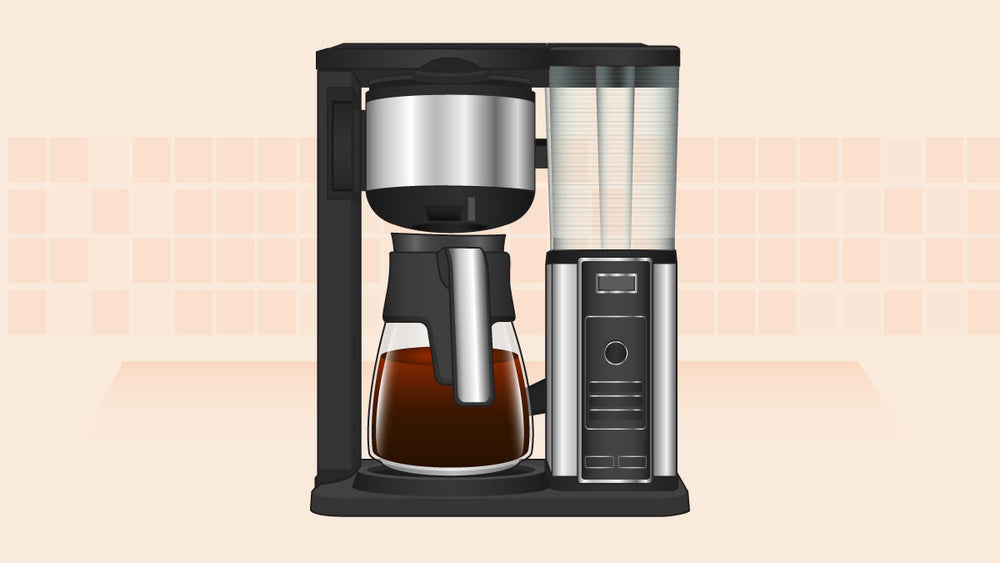
Ninja Coffee Makers are powerful tools, and like the best tools, they can be a little confusing if you’re unfamiliar with them.
We'll walk you through setting up your new coffee machine and discuss how best to make delicious coffee in no time!
Setting Up Your Ninja Coffee Maker for the First Time

Properly setting up your fancy new Ninja Coffee Maker will help your first cup be as delicious as possible. Let’s look at some key things to know.
1. Unboxing & Assembling
Thankfully, receiving and unboxing your Ninja Coffee Maker should be fairly simple. The coffee maker usually comes as one large unit, with separate pieces that may be inside the machine or securely packaged outside.
Generally, the box will contain a few key items:
- The machine itself
- The water reservoir
- The carafe
- The scoop
- Two separate filter holders.
To be on the safe side, check that you have all of these items before you proceed. If you don’t, double-check inside the machine and packaging and get in touch with customer service.
2. First-Time Cleaning
Before doing anything with your machine, wash or wipe down the coffee maker and its different components. You'll want to clean the items to ensure they're safe.
First, gently wash the components in warm, soapy water and then rinse thoroughly. For the external surfaces of the machine, use a moist cloth to wipe them down.
Ninja recommends running water through the machine several times before your first brew to rinse and purge the machine's internal components.
Here’s a step-by-step guide to this process:
- Fill the water reservoir to the max line; be sure not to exceed that level.
- Plug the machine into the wall.
- Ensure that the cup platform in your machine is out of the way, and place the Ninja carafe onto the intelligent warming plate. During the priming process, the warming plate will heat up, and an indicator light will illuminate to let you know that the plate is hot.
- Select “Full Carafe” and “Classic Brew” on the machine without putting coffee into the brewing basket. As the pump pulls the water through, it will wash away any tiny particles of dust or debris that may have settled during the manufacturing and storage.
- After this first cycle is complete, discard the water. Refill the water reservoir, and then carry out the same brewing cycle. Once you’ve done these two “full carafe” cycles, your machine is cleaned out and primed to brew.
3. Programming the Machine
Programming the machine will allow you to make coffee on your timescale.
The following steps will ensure your machine has the correct time.
- Start by plugging the coffee maker into a power socket and turning it on. If the clock isn't set, it will flash intermittently.
- Start by pressing the hour button until you reach the appropriate time, and then repeat this for the minute button. These two buttons are just next to the little clock.
- After you programmed the clock, the numbers will flash for about five seconds. Once they stop flashing, the time will be set.
- If you need to reset the time or accidentally let the brewer set itself to the wrong time, press the hour or minute button again. This will make the time flash, starting the process over again.
One of the main benefits of having a smart coffee machine like a Ninja Coffee Maker is that you can set it to make coffee at a pre-scheduled time. If you know that you’ll be getting up at 7 AM for work, you can set it to brew your coffee in time for you to get downstairs and grab a cup.
Here’s a step-by-step guide to setting auto-brew:
- Press the “delay brew” button on your coffee maker. The small display should switch to the previous time the machine was set to, or it will flash “00:00” if this feature has never been used.
- While the numbers on the display are flashing, press the hour and minute buttons to select your preferred time. This is the same process as setting the time on the machine.
- Once you’ve got the time you’d prefer programmed in, use the dial to select the size of brew you want to make at that time. A carafe is ideal for a whole family, but one mug may be great for just you.
- Select either “classic” or “rich” brew type — those two buttons will be flashing until you select one of them, and then the flashing will stop.
- After you’ve completed these steps, you can either allow the “delay brew” button to flash for a few seconds, after which point it will lock in, or press the button again. Either way, you’ll activate the delay brew feature, and the light on the button will be illuminated to indicate this.
- Finally, place the appropriately sized vessel under the brew basket, and your coffee will be brewed at the time you set.
Step-by-Step Guides to Using the Ninja Coffee Maker
Brewing coffee with your Ninja Coffee Maker can seem complex, but the machine is there to help keep things straightforward. Here, we’ll discuss some key things to know and then give you a step-by-step guide to making a great cup of coffee.
1. Choose the Brewing Mode
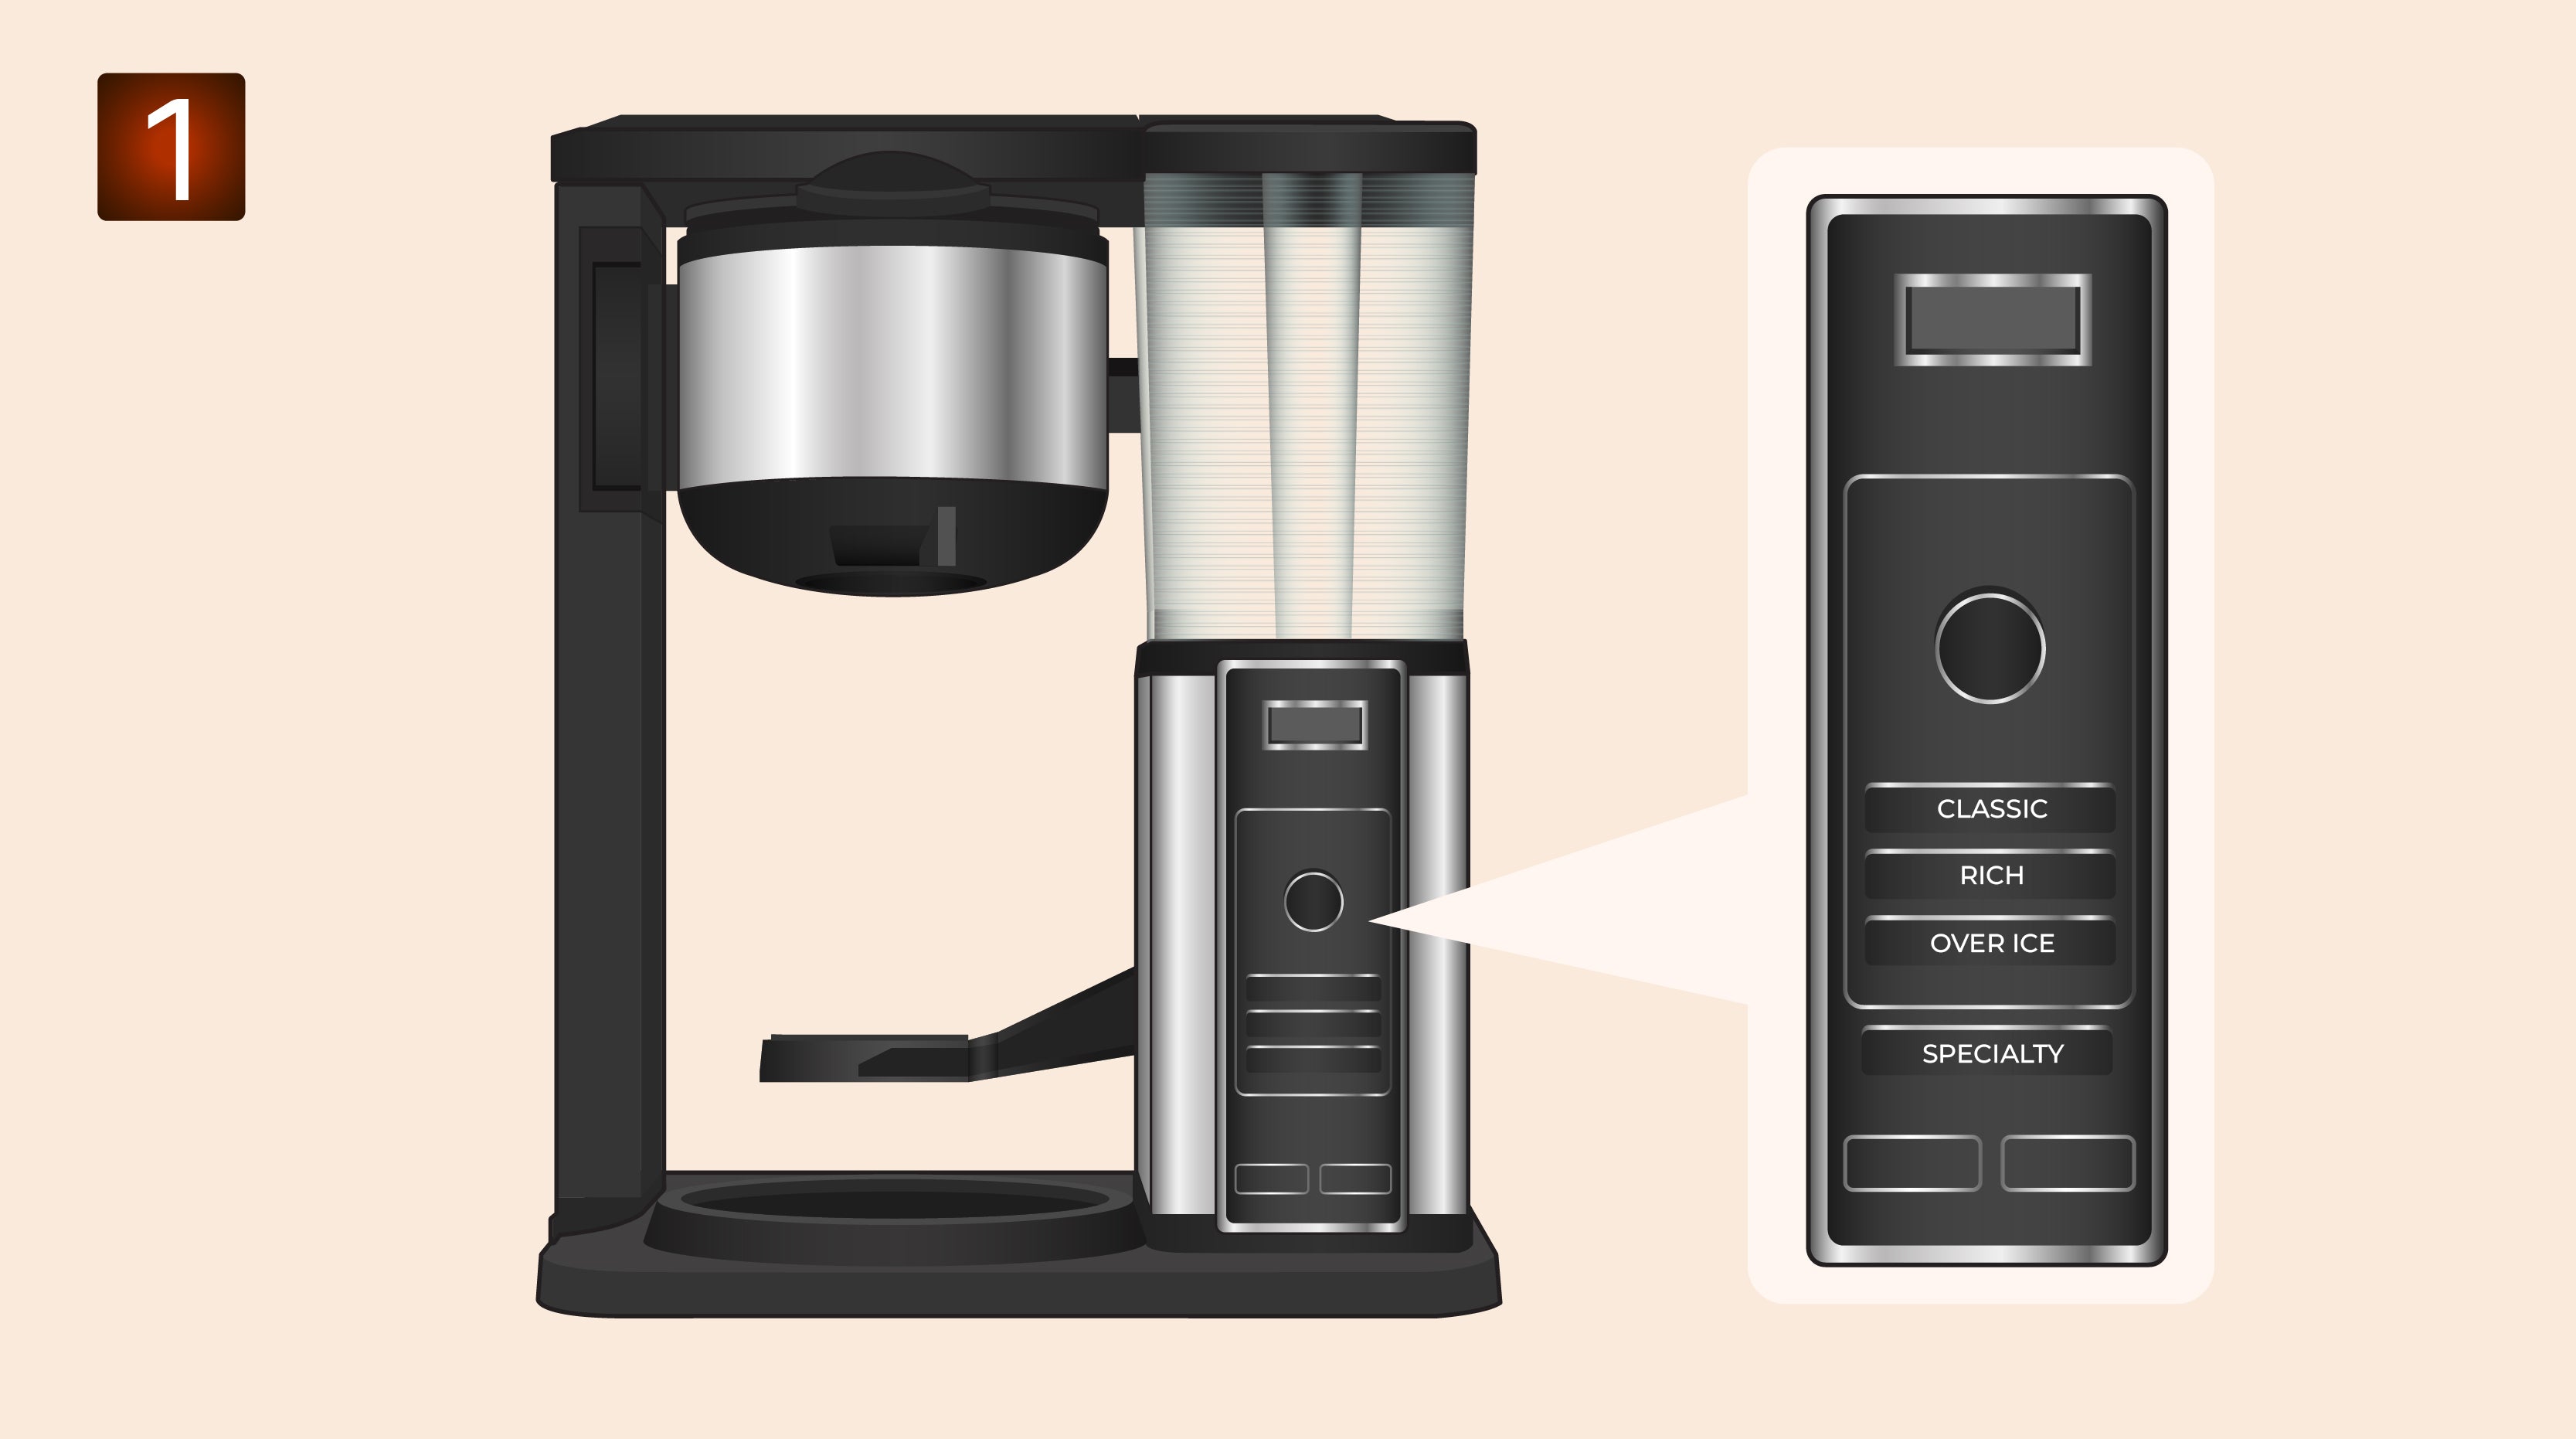
The brewing modes are only slightly different from one another. However, the small differences in the amount of water and the heat the water reaches can have some profound effects.
Here are the five main brewing modes and what they create:
- Classic — A simple drip-brew method that creates a smooth, tasty cup. This is a similar program to most coffee makers.
- Rich — A program that leads to slightly more extraction in the brewing chamber, giving the final cup a more intense flavor. it's ideal for a stronger black coffee or a coffee with syrups that maintain a notable flavor.
- Over Ice — This is the classic way to brew iced coffee — the machine combines hot water and grinds as normal, pouring the coffee into a container filled with ice to rapidly chill. Ensure the container you’re using has plenty of ice ahead of time; the coffee maker will use less water to ensure the vessel doesn’t overflow.
- Cold Brew — The cold brew method uses much cooler water than other programs. This takes around fifteen minutes and creates a smooth, naturally sweet coffee.
- Specialty — The specialty setting brews a smaller amount of water with a lot of coffee grounds, which means that the final coffee is very strong. Combining this with frothed milk lets you create drinks similar to cafe lattes and cappuccino coffee.
2. Measure the Coffee Grounds

When brewing coffee in any situation, you’ll want to get the ratio of beans and water correct. The flavors of the coffee will get diluted if you use too much water, and will be overpowering if you use too little.
Most Ninja Coffee Makers come with the Ninja Smart Scoop, which can measure ingredients volumetrically. There's a large scoop at one end and a smaller one at the other. The measurements for coffee are listed clearly on the top of the tool, and the tea measurements are listed on the underside.
The coffee side has a number of different symbols, including the “Full Carafe Mode” icon alongside “4-6.” This indicates that when brewing in Full Carafe Mode, you should use four to six of the large scoops of coffee.
Thankfully, the Ninja Smart Scoop and Coffee Maker make measuring out coffee and water very simple.
Simply fill the water reservoir, and consult the table below:
|
Serving Icon |
Serving Size (oz) |
How Much Coffee? (using Ninja Smart Scoop) |
|
Cup |
9.5 |
2 to 3 small |
|
XL Cup |
11.5 |
2 to 3 small |
|
Travel Mug |
14 |
3 to 5 small |
|
XL Multi-Serve |
18 |
3 to 5 small |
|
Half Carafe |
30 |
3 to 4 big |
|
Full Carafe |
60 |
4 to 6 big |
|
Specialty |
4 |
2 big |
The only time the information in this table doesn’t apply is when you’re brewing cold-brew coffee with your Ninja Coffee Maker. In that instance, add one more scoop of coffee in whatever size applies to your serving.
3. Brew the Coffee

Brewing in a Ninja Coffee Maker is perfectly simple, and the machine makes a lot of different processes easy and fast.
Here’s our straightforward step-by-step guide:
- Plug in and power on the Ninja Coffee Maker and fill the water reservoir to the maximum fill line.
- Double-check that your filter and filter holder are securely sitting in the coffee maker, and then add the appropriate amount of coffee for the brew you’re making.
- Use the dial to select the size that you’re brewing. For a single cup, turn the dial all the way to the left, selecting the cup icon.
- Next, select a brew style from the machine options. Twist the “start/select” dial to choose the brew type you want.
- Finally, press the “start/select” dial to begin brewing. There may be some small pauses as the coffee maker carries out its pre-infusion step, but it will proceed to create and dispense coffee.
Brewing Tea
The tea brewing function uses the same settings as the “specialty” coffee mode.
Here’s a simple guide to brewing tea in your Ninja Coffee Maker:
- After plugging in and turning the machine on, place the tea filter holder into the machine so it’s sitting well. The permanent tea filter should already be installed in the filter holder.
- Add the tea to the filter — either one big scoop of loose leaves or three tea bags.
- Turn the “start/select” dial to “specialty,” and then press it. There will be a pause, and then brewing will commence.
4. Froth the Milk

The Ninja Coffee Maker's fold-out frothing attachment is a great way to quickly get whipped, frothed milk.
Here’s a simple guide to using it:
- Add milk to a cup or a small milk jug until it’s around ⅓ full. If you want to create cold foam, move straight on to step two. Otherwise, microwave the milk until it’s hot, which should take around a minute.
- Hold the cup under the frother and lift it to submerge the whisk. It should be just below the surface of the milk; this will allow it to incorporate air rather than just stir.
- Froth until you reach your desired consistency. Typically, 30 to 45 seconds is ideal.
- After you’re finished, remove the frother whisk by twisting it clockwise and gently pulling it down. Wash it after each use — the dishwasher or hand washing is fine.
5. Clean the Ninja Coffee Maker
After each brew, remove the used grounds and clean the filter. The filter holder is removable to make this process easier, but don’t forget to close the drip stop first to prevent it from popping up. Then, scoop or wash out the used grounds and wash the permanent filter with warm, soapy water. Rinse and dry the filter, then return it to the machine.
Get to Know Your Ninja Coffee Maker
Understanding the machine’s features and settings can help you become a pro in no time! Here’s a rundown of some popular features and settings that you’ll find useful.
Water Reservoir
The water reservoir is standard equipment for all Ninja Coffee Makers. It’s a plastic tank to which you add water and prominently features a “max fill” line. This simplicity works well to ensure the machine's longevity because fewer parts may fail, and it’s harder to misuse and break it.
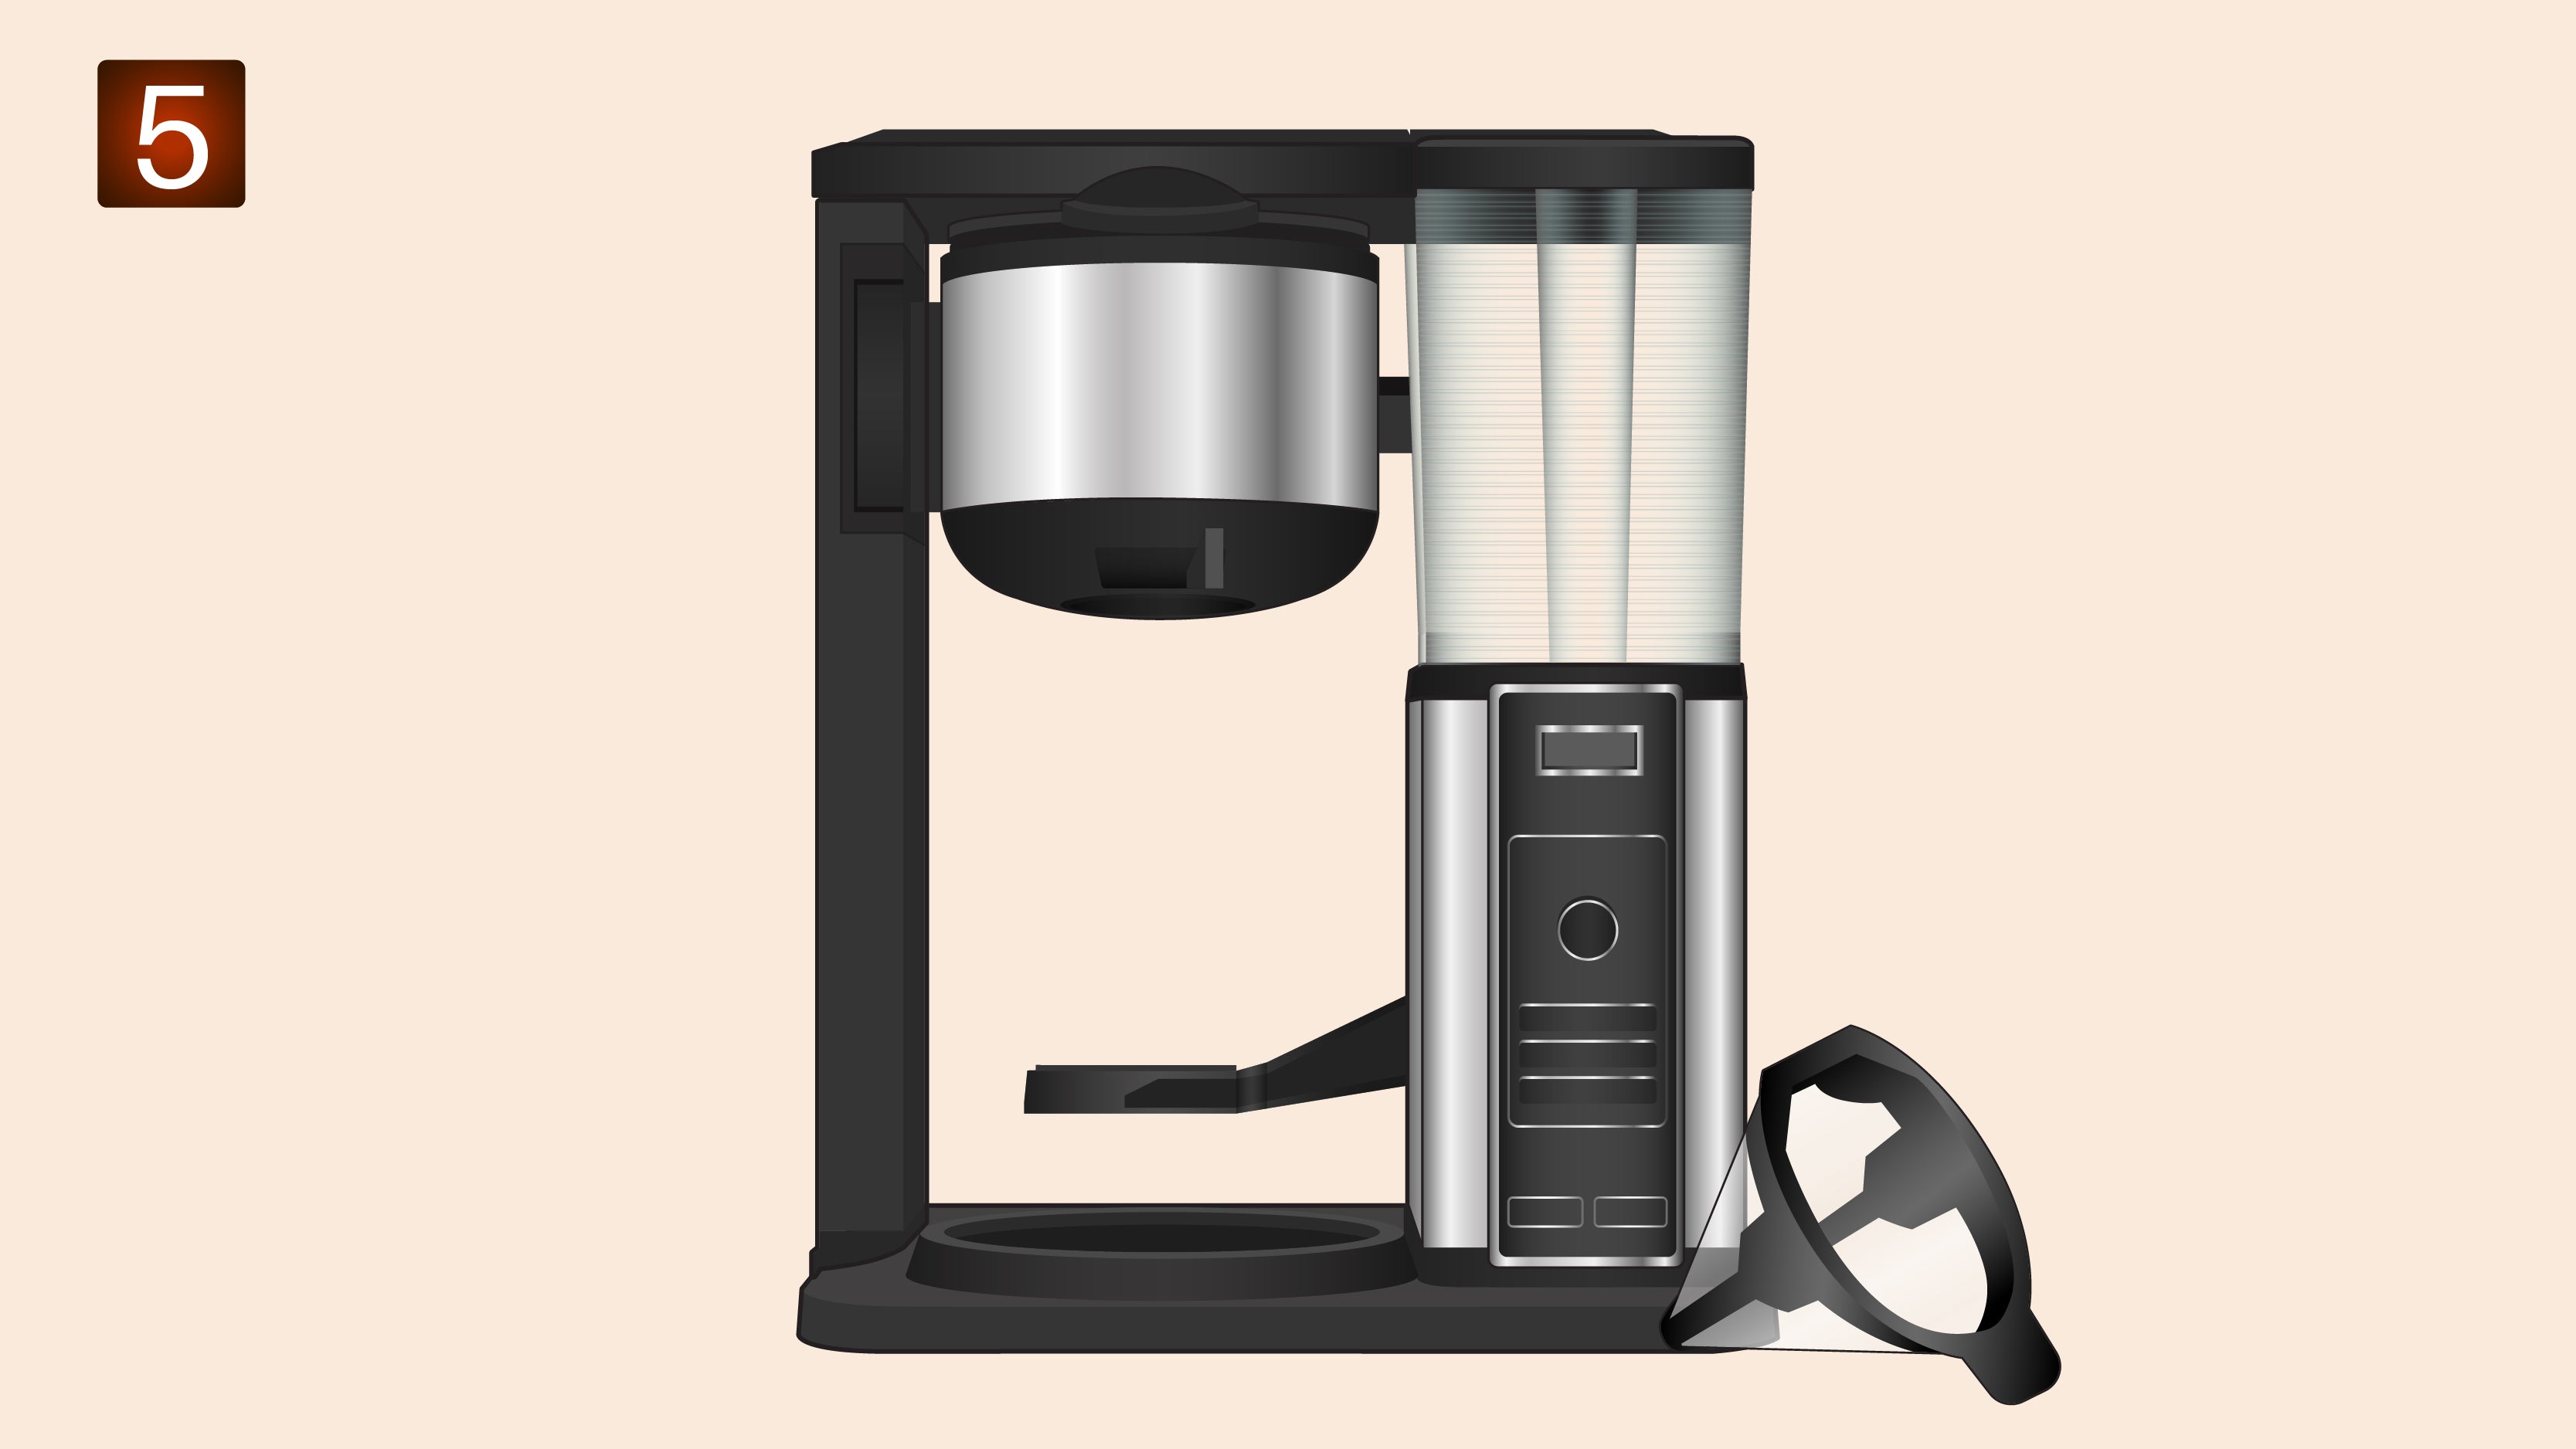
Filter Holders
The Ninja Coffee Maker's filter basket is a large, drawer-like item that slides in and out of the coffee maker. You can place either of the two separate filter holders into it. Ninja created two baskets to prevent flavors from crossing between coffee and tea brewing.
The holder with the orange handle is for the coffee filter and has a small coffee bean icon. The holder with the green handle is for tea and has some small tea leaves. Depending on which of the two baskets is inserted into the machine, coffee or tea options will light up on the control panel.
The filter holders come with pre-installed permanent mesh filters, which means you may not need to buy paper filters repeatedly. However, if you prefer paper filters, you can use them to brew coffee.
Here’s a simple guide:
- Take out the permanent filter from the filter holder. It should lift vertically out of the holder without much resistance.
- To make the paper filter fit well, fold a #4 paper cone filter along the seams. Be sure to do so evenly to prevent air pockets from forming between the filter and the basket.
- Slot the paper filter into the coffee maker firmly. Take the time to ensure the filter is well-seated so the water travels through the coffee better.
Carafe
The pouring carafe for Ninja Coffee Makers is a simple piece of equipment, though a very functional one. Its brew-through lid lets you easily make your coffee without fussing with different attachments. It sits snugly on the warming plate, which keeps the coffee at a good temperature.
Drip Stop
The drip stop is a simple feature but a very useful one. Essentially, it's a small screen that slides in the way of the coffee coming out of the machine, meaning that the flow of liquid stops. This can be used to pause brewing for a moment or stop spills and drips after brewing.
Depending on the exact model, this is either controlled by a small collar at the base of the brewing chamber or a small button. If you’ve set your coffee maker to perform a “Delay Brew,” check that the drip stop is open.
Intelligent Warming Plate
The intelligent warming plate is directly under the brewing chamber, where the carafe sits. It only activates if you brew a full or half carafe, regardless of whether you opt for a rich or classic brew. If you want to extend the time that the warming plate stays on, check the detailed instructions in your manual.
However, we want to highlight that the plate doesn't have a weight sensor to detect when you've finished the coffee. Press the "stay warm" button after you've finished the coffee to prevent the plate from heating an empty carafe. The "hot surface indicator" light will stay lit up until the plate is safe.
Keeping Your Ninja Coffee Maker in Top Condition
Ensuring your Ninja Coffee Maker is clean and well-maintained will lead to better coffee. Regularly remove any buildup from the machine to ensure every cup is tasty and fresh.
Cleaning the Water Reservoir
The water reservoir is probably the easiest part of cleaning the machine. Simply remove and empty it before hand washing it with dish soap. The flip-top lid must be hand-washed, but the rest of the reservoir is also safe to put on the top rack of your dishwasher.
For most people, it's wise to clean the water reservoir once per week or after a period of disuse. If the coffee maker is used regularly, there will be very little to no mold buildup, but sitting water can lead to mold growth. Therefore, empty the tank if you know the machine will be disused, and clean it thoroughly before using it again.
Cleaning the Filter Basket
We recommend cleaning the filter basket after each use:
- Start by closing the drip stop. This will prevent you from dripping leftover coffee around your kitchen.
- After the brewing process has totally concluded and the coffee grounds are cool, remove the filter holder from the coffee machine. Discard the grounds, and then rinse and wash the filter and filter holder with soap and water.
- If an overflow occurs and coffee or grounds have gotten into the brew basket, rinse with clean water.
- Wipe any surfaces with splatters while the brew basket is out of the machine.
Descaling the Machine
Descaling the coffee maker is a crucial part of maintenance to ensure the flavor of your coffee stays clean and tasty. If your Ninja Coffee Maker detects it needs to be cleaned, the clean button will light up.
Here’s how to descale your machine:
- Select the carafe size from the size options, and place the carafe under the brew basket.
- Fill the water reservoir with your preferred descaling solution to the Max Fill line — do not exceed that line.
- Once the reservoir is filled, press the clean button. This will activate the cleaning cycle, which will take around eight minutes.
- After the clean cycle, empty and rinse the carriage and water tank. It’s important to clean thoroughly, as this will remove any lingering descaling solution that could impact the flavor of your coffee.
- Once the clean light turns off, fill the water tank with clean water to the max fill line. Run two more full carafe cycles to ensure any descaling solution is rinsed out of the brewer.
- If the clean light does not turn off after the cleaning cycle, you'll need to do it again. This is likely due to advanced calcium buildup in the machine. When the machine senses the internal system is clean, the light will switch off.
Choosing the Best Coffee for Your Ninja Coffee Maker

When selecting coffee for your Ninja coffee maker, you always want to get the best stuff possible.
Here are some things to keep an eye out for when looking for premium coffee:
- Organic — Coffee farmed through organic growing practices will have a lower chance of containing harsh pesticides from the farming process. This may encourage the growth of stronger plants and a better flavor.
- Certified Mold-Free — Mold can sometimes grow on grain-like crops during storage and shipping, and this, unfortunately, includes coffee beans. To ensure you’re drinking mold-free coffee, look for beans that have been tested and certified as such.
- Freshly Roasted — Fresh coffee has more intense flavors and better longevity of coffee beans, so aim to buy beans as close to roasting as possible, within two to four weeks of the roasting date.
- No Sugar Added — Adding sugar can sometimes be done by unscrupulous roasters to mask bad flavors. Companies typically won't add sugar to their coffee products but may add a natural sweetener like honey or organic monk fruit for a more complex, delicate sweetness that enhance.
Light, Medium, or Dark Roast
The roast level you aim for is a matter of personal preference, but if you’re just getting started, you might not know the differences. The three main choices are light, medium, and dark roast.
A light roast retains more of the original flavors, giving the coffee citrus and fruit notes and a gently woody, nutty flavor.
A dark roast is at the other end of the scale. The beans' acidity is greatly reduced during roasting, producing a smoother final cup. The sugars have caramelized and developed, creating a rich and complex natural sweetness. Tasting notes often include caramel, dark chocolate, and rich earthiness.
Looking for a good starting point for beginners? A medium roast coffee is somewhere between dark and light. A skillfully roasted medium bean will keep some natural plant flavors, such as nuttiness and floral notes. It will also contain some sweetness and caramelization, which often enhances the original flavors.
Bean Type: Arabica, Robusta, or Blend?
There are a lot of different types of coffee beans out there, but generally, there are two big ones: robusta and arabica. These two beans come from two different plants and have slightly different flavors. How do you know which one to pick?
Arabica coffee is more popular than robusta, largely because the beans have a higher sugar and fat content. The coffee has a lighter, brighter, and smoother flavor, with common tasting notes in premium arabica beans, including stone fruit, berries, and citrus. A great example of this is the DaLat from Cafely.
Because of its lower sugar content, robusta beans are often darker, earthier, and richer in flavor. Some beans, like Cafely’s BanMe, have around twice as much caffeine as arabica.
In a robusta coffee, you may taste notes of dark chocolate and earth. Robusta beans are typically roasted to a very dark level to coax out their natural sweetness, so some have a dark cherry or malty flavor.
FAQs: Common Questions About Using a Ninja Coffee Maker
Still have some questions about the Ninja Coffee Maker? Here are some FAQs to clear up any common misconceptions.
1. Can I Use Ground Coffee in a Ninja Coffee Maker?
Yes, pre-ground coffee works perfectly in the Ninja Coffee Maker. In fact, the different settings of the coffee maker rely on the grind size staying relatively consistent to achieve different results. The only thing to bear in mind is to measure the appropriate amount of coffee for the serving you’re brewing.
2. How Do I Make Iced Coffee With a Ninja Coffee Maker?
Before brewing, fill the cup or carafe with ice, and then add the appropriate amount of coffee grounds to the filter for the size you’re making. Then, select the “over ice” setting and start the brew.
3. Does the Ninja Coffee Maker Have a Built-In Frother?
Yes, the majority of Ninja Coffee Makers have a built-in frothing attachment. Essentially, this is a small, fold-away whisk that whips bubbles into milk. After each use, remove this by twisting it clockwise. Then, wash it.
4. How Often Should I Be Cleaning My Ninja Coffee Maker?
This depends on how much you use the coffee maker. However, a good rule of thumb is to clean the filter and filter holder after each use, to descale the machine, and to clean the brew basket and the water reservoir once a week.
5. Can I Use Pods in a Ninja Coffee Maker?
While some coffee makers can brew coffee from grounds and pods, Ninja Coffee Makers are designed only for grounds.
6. What’s the Difference Between “Classic” &“Rich” Brew Modes?
The "classic" mode works like coffee makers always have and creates a smooth, traditional flavor. The "rich" mode uses a slightly different program to get more flavor from the coffee, leading to a stronger, more intense flavor.
7. How Do I Program the Ninja Coffee Maker for Auto-Brew?
Ensure that the clock is set to the correct time, and then press the "Delay Brew" button. Select the time you'd like the brew to happen, then select the size of the vessel you're brewing for and the brew type. Finally, press the "Delay Brew" button again, which will illuminate to indicate it's set.
8. Why Is My Coffee Maker Beeping but Not Brewing?
The most common reason this happens is because one of the components isn't mounted correctly. Check to make sure the carafe, water tank, and brew basket are all sitting as they should, and you should find that one component just needs to be pushed into the correct place.
9. Can I Brew a Single Cup with a Ninja Coffee Maker?
Yes, the single-cup setting brews roughly 9.5 oz of coffee, perfect for a small cup. Other settings brew a larger cup, a travel mug, and an extra-large travel mug.
10. What Grind Size Is Best for a Ninja Coffee Maker?
Medium grind is the best option for a Ninja coffee maker — it can allow you to achieve a balanced flavor and extraction while also allowing the different settings to impact the coffee’s final flavor well.