
So, you're ready to make coffee. You've got the beans, the water's heating, the filter is prepped and ready to go. And then it hits you. No grinder.
Before you give up and plan a trip to the drive-through coffee shop, there's a question buzzing in your head: Can I just toss these beans into the blender?
The short answer: Yes, you can grind coffee beans in a blender in emergencies — but it's not something we'd recommend for regular use.
Why Blenders Aren't Ideal for Grinding Coffee
Heat Damage
Firstly, the beans will get hot when they’re blending.
The burrs of a conventional coffee grinder are ceramic because the material is resistant to changes in heat. In a blender, however, the blades are metal, which is an excellent conductor of heat.
The friction between the beans will heat the blades and the motor that powers them, getting so intense that you may damage the blender you’re using and cause the beans to lose flavor.
Inconsistent Grind Size
A second issue is that the grind size won’t be consistent across all the beans.
Another benefit of conventional grinders is that the burrs only allow pieces of a certain size or smaller to pass.
A blender doesn’t have this function, so your grounds will be unevenly sized. This will cause the brewing process to express the flavors of the grinds at different levels, leading to a potentially bitter final cup.
Wrong Grinding Action
The blender's blades slice the coffee beans instead of crushing them.
Though this might not sound like a big deal, it impacts how the flavorful oils from the coffee are distributed.
When a coffee bean is ground, it releases oil, coating the grounds around it. When a bean is sliced, however, much less oil is expressed.
The result is coffee that tastes weaker and more watery.
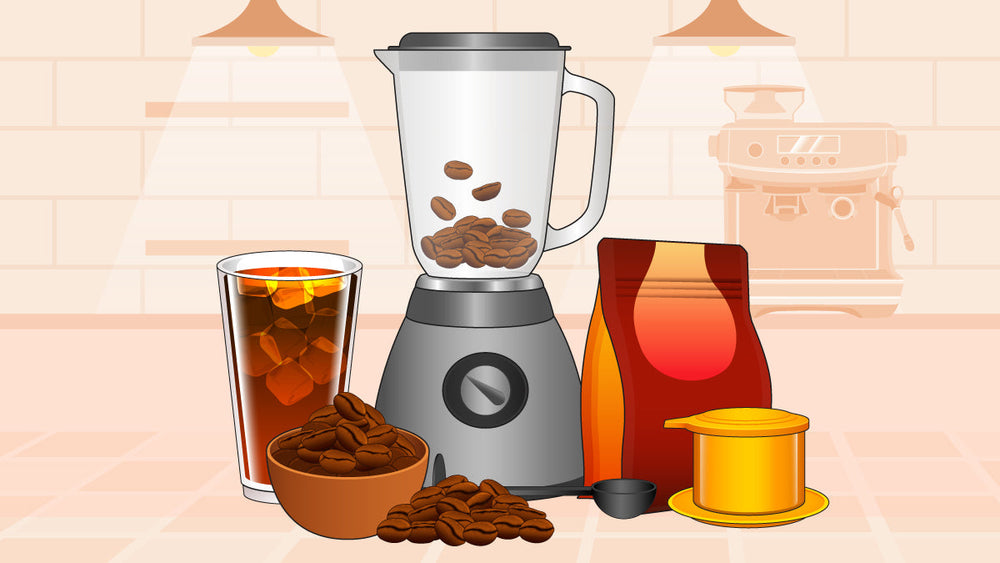
A Step-by-Step Guide: Grinding Coffee Beans in a Blender
If you’ve got a blender but no grinder, you can use it to grind your coffee beans. Let’s take a look at the step-by-step process and grind some coffee!
- Check if your blender has a grinder setting. If so, select it. If not, opt for a medium-high speed.
- Place the coffee you’ll be grinding into the blender. For most blenders, somewhere between ¼ cup and ½ cup is a good amount, but you can blend what you intend to use.
- Run the blender in three- to six-second pulses for around thirty seconds. This prevents everything from getting too hot, stopping you from losing flavor, or damaging your blender.
- Tip your blender from side to side while you pulse to mix up the grounds and help you catch any larger pieces that may have sunk to the bottom.
Best Grind Size for Your Brewer

Brewing coffee is about finding a balance between heat, pressure, and time. When you switch between different brewers, those variables can change drastically. Here are some examples of how different grind sizes can be used for different brewing methods.
Fine Grind (Espresso, Phin, Moka Pot)
When ground finely, coffee has a higher surface area. This consistency is best for high pressure, high temperature, and quick brewing.
A good example of this is when brewing an espresso: despite the water and coffee only having around thirty seconds of contact time, the flavor is intense.
A moka pot has a similar process, where steam forces the water through the coffee. Although quite dissimilar from espresso coffee, phin coffee also uses finely ground beans.
A phin filter uses gravity rather than a pump or steam pressure to draw the water through the coffee bed. Therefore, the brewer uses a fine mesh and longer brew time to create a potent drink that’s long-lasting and complex.
Medium (Pour Over, Aeropress)
Medium consistency coffee grounds take a little longer to express, but can lead to overextracted coffee if the brewing goes on for too long. The brewing methods best suited to medium-ground coffee take, at most, a couple of minutes.
Pour-over coffee involves using consistent patterns of pouring water to get the most contact time for the coffee.
Brewing with an Aeropress is a little different, pumping a plunger to apply small, constant pressure to produce a well-extracted cup.
Medium grounds are often used, since the short contact time (typically around one to two minutes) combines with slight pressure to get the best out of them.
Coarse (Coffee Bags, French Press)
Grinding coffee coarsely slows down the speed at which coffee compounds dissolve into your cup, meaning that coarse grounds are often used in immersion methods.
The most popular immersion brewing method is the French press.
To brew with this device, leave the grinds steeping in hot water for four to five minutes to extract the most flavor possible. Using larger grounds prevents the coffee from being over-extracted and bitter.
Other Ways to Grind Coffee
If you don't have your favorite coffee grinder with you, don't panic! You can still secure a tasty cup of premium coffee by using some of these alternative methods to grind your coffee.
Food Processor
Grinding coffee in a food processor is similar to grinding coffee in a blender. The benefit of using a food processor over a blender, though, is it typically has different speeds or modes to grind beans better. Here’s how to grind with a food processor:
- Add the beans into your food processor and place the lid on top. Add enough beans to cover the blades with a little headspace.
- Pulse in three to six second increments until the grounds reache your desired consistency. To grind the beans as evenly as possible, shake the food processor from side to side between pulses.
- If necessary, scrape down the sides of the processor to get the grounds that have been knocked to the sides. For your safety, you should unplug the food processor before this step.
Like with the blender, the blades don’t crush your coffee beans. But there’s another problem with the food processor. You may have to grind a large volume of beans to make it work effectively. To prevent the excess grounds from going stale, store them in an opaque, airtight container.
Hammer or Rolling Pin
This may sound a little absurd, but you can grind coffee beans with a hammer or a rolling pin. It's functionally the same as burr grinding — a hard surface is crushing the beans. Here are the best practices for this method:
- Add the beans you want to grind to a plastic bag. Try to use a bag made from a tougher, thicker plastic.
- Using the hammer or the rolling pin, apply firm pressure to the beans to crush them into grounds. After roasting, beans (particularly dark roasts) can be quite brittle, so this process may not require as much force as you might expect.
- Once you’ve reached the desired consistency, transfer the grounds to your coffee maker and brew.
The main disadvantage of this method is that the beans won’t get to a fine consistency. Therefore, the grounds might not be useful for espresso but are great for cold brew or French press.
Mortar & Pestle

Our final alternative option is an old-school method people have used to grind beans and seeds for centuries.
If you’ve got a couple of options, the one that will likely serve you best is a ceramic mortar and pestle — it will be most resistant to the oils that the beans express.
- Add beans to the mortar until it’s around a quarter full. Any more, and it’s likely you’ll end up spilling your precious coffee.
- Hold the mortar in one hand and the pestle in the other. You may prefer to have the mortar on the table to start with, but when you reach a powder-like consistency, it’s often easier to hold it.
- Crush the beans with a twisting motion. This applies a lot of force to the beans without swinging the pestle up and down like a hammer.
- Stir the mixture of beans and grounds, and repeat the crushing, twisting motion. Repeat these two steps until your coffee is at the consistency you want.
The mortar and pestle can be a great method for someone looking for fine coffee grounds. Once the beans are a rough powder, you can crush them more by stirring.
The downside of this method is how time-consuming the process is. While an electric grinder can prepare your beans in less than a minute, a mortar and pestle is likely to take five minutes or more to achieve the same consistency.
Grinding Coffee With an Immersion Blender: A Dangerous, Messy Mistake
Grinding coffee beans with a countertop blender is safe and may work in a pinch. However, using an immersion blender to grind coffee beans is both dangerous and messy. The idea gained popularity after it became a “life hack” trend online, resulting in people giving it a go.
The concept is simple. When inverting an immersion blender, you’re left with a small bowl with a spinning blade in the base.
Add coffee beans to that small bowl and cover it with plastic wrap before turning the blender on. After a few seconds, your coffee should be ground and ready for brewing.
However, it’s rarely so simple, and the grounds themselves aren’t as good as they could be. Here is a breakdown of why the method isn’t ideal:
- Uneven Grinding — As with a countertop blender, the spinning blades cannot grind the beans to a uniform size. Instead, they’ll cut randomly, leading to unevenly sized chunks. This will lead to uneven extraction and poor flavor.
- Blades, not Burrs — One of the reasons burr grinding is favored is that the crushing motion effectively expresses a lot of the coffee’s natural oils. By slicing the beans with blades instead, that expression isn’t taking place, leading to diminished flavor.
- Dangerous — While immersion blenders can be handy when used as intended, they can also be very dangerous. The rapidly spinning blades are hazardous enough, especially when you consider that they may also be extremely hot from the friction of the beans.
- Messy — The method is very messy, especially compared to a conventional grinder. You must remove the plastic wrap to get the grounds into your cup. In doing so, it’s quite common to spill grounds everywhere.
- Wasteful — Using single-use plastic for this isn't ideal. Plastic wrap is the only substance that works for the task: forming a seal to prevent spillage and being transparent so you can monitor grind consistency. However, it also has a profound negative impact on the environment.
FAQs: Can I Grind Coffee Beans With a Blender?
Now that we've broken down the benefits and drawbacks of grinding coffee beans with a blender let's address some FAQs.
1. Is It Okay to Grind Coffee Beans in a Blender?
Yes, it’s okay to grind coffee beans in a blender. To be as safe as possible, it’s important to pulse the blender for three to six seconds instead of allowing it to blend consistently, as it may overheat and become damaged.
2. How Can I Grind Coffee Beans Without a Coffee Grinder?
Without a coffee grinder, grinding coffee beans with a blender is a great option, or you could place the beans into a plastic bag and crush them with a rolling pin or a hammer. Alternatively, you could go old-school and use a mortar and pestle to create a consistently fine powder.
3. What’s the Difference Between a Coffee Grinder and a Blender?
A coffee grinder typically consists of two burrs, one of which rotates. The beans fall into the gap between the two burrs and get crushed down to the size you want. On the other hand, a blender uses rotating blades to chop up the beans instead of crushing them.
4. What Is the Best Budget Coffee Grinder?
Buying a coffee grinder can get expensive and complex very quickly. If you’re on a budget, it may be worth buying a small hand grinder to see if you like it before splurging on an electric grinder.
5. Do Coffee Beans Expire?
Yes, coffee beans expire, though they’ll go stale before the expiration date — around two weeks from when they’re opened. After a while, they may become moldy. If sealed correctly, they may not spoil at all. Just to be safe, though, you shouldn’t consume coffee after a year of purchase.
6. Can Coffee Beans Be Ground in a Mixer?
Yes, you can grind coffee beans in a mixer, also known as a blade grinder. The downside is that the grind will typically be quite inconsistent, leading to poor flavor, and blade grinders can get damaged and overheat over time.
7. Will a Regular Blender Grind Coffee Beans?
Yes, a regular blender should have enough power to grind coffee beans. However, blending coffee beans won’t result in as good a grind as using a burr grinder to crush them. Furthermore, a blade grinder may overheat when blending coffee beans, so only blend them by pulsing for three to six seconds.
8. Why Are My Coffee Beans So Hard to Grind?
Some coffee beans may be harder to grind than others for all sorts of reasons, from the quirks of how those particular beans were grown to how darkly they’ve been roasted. The darker a coffee bean is roasted, the more brittle it becomes. To get beans that are easier to grind, try a darker roast.
9. Is Grinding Coffee at Home Worth It?
Yes, grinding coffee at home is worth it. Freshly ground coffee beans offer a complex and delicate blend of flavors and aromas, which can be lost when the beans are packaged and sit on a grocery store shelf for a while.
10. How Long Do Coffee Beans Last After Grinding?
After you’ve ground your coffee beans, they will retain flavor for around two weeks when stored in an opaque, airtight container before going stale.