Frothing coffee turns a basic cup of coffee into something rich, creamy, and café-quality. That silky foam is certainly beautiful, but frothing also adds smoothness, depth, and a touch of indulgence.
You won’t need an espresso machine or barista training to get it right. With just a few simple tools — or even none at all — you can make thick, velvety foam at home in minutes.
We’ll walk you through how to froth milk for coffee, step by step, using easy techniques that even beginners can do.
Easy Ways to Froth Coffee at Home
There are tons of ways to froth milk. With anything from a milk frother, a French press, or just a whisk and a jar, you can make foam that’s light, fluffy, and delicious.
Below, you will learn how to use a frother for coffee, how to make froth without one, and how to use a French press for impressive results. Each method is beginner-friendly and works with both dairy and plant-based milks. The key is finding what works best for you.
Below are three simple methods anyone can try:
- Using a milk frother (electric or handheld).
- Frothing with a French press.
- Frothing without tools using a jar or whisk.
Let’s explore each technique in detail, so you can master how to froth coffee using what you already have in your kitchen.
How to Froth with a Milk Frother

A milk frother is the fastest and most consistent way to create rich, café-style foam. They come in two main types — electric frothers, which heat and froth your milk automatically, or handheld frothers, which require preheated milk and a little movement.
How to Froth Milk With an Electric Frother
Electric milk frothers offer the fastest way to create milk foam, especially if you’re making large volumes.
Here are the simple steps for using an electric milk frother:
- Add Your Milk — Fill to the minimum or maximum line depending on how much milk foam you wish to make.
- Press the Froth Button — Most electric models have options for hot or cold foam.
- Wait 30 to 60 Seconds — Wait while the machine heats and whips the milk.
- Pour and Enjoy — Use a spoon to scoop foam on top if making a cappuccino.
How to Froth Milk with a Handheld Frother
Handheld frothers are incredibly simple to use, as well, but do require a bit more detail than electric ones.
Here’s how to create creamy foam with this tool:
- Heat Your Milk— Warm the milk to about 150°F (65°C) on the stove or in the microwave. It should be hot but not boiling.
- Pour the Milk into Your Container— Pour the milk into a tall container, like a glass or metal jug.
- Submerge the Frother— Place the head of the frother into the milk, then turn it on. Move the wand up and down for about 30 to 45 seconds.
- Watch for Volume Increase— The milk should double in size and develop a fine foam.
- Pour Immediately — Scoop or pour your frothed milk into your brewed coffee, layering the foam on top.
How to Froth Milk Using a French Press
A French press coffee maker is one of the most reliable tools for creating thick, silky milk foam. The plunger mechanism adds air to the milk, creating a texture similar to what you’d get with a milk frother.
Here’s how to froth milk with a French press:
- Heat Your Milk — Warm your milk on the stove or in the microwave until it reaches 150°F (65°C). Do not boil.
- Pour into the French press — Transfer the hot milk into your French press, filling it no more than halfway to allow space for foam expansion.
- Pump the Plunger — Hold the lid firmly and pump the plunger up and down rapidly for 30 seconds. You’ll see the milk volume increase as it becomes light and airy.
- Tap and Swirl — Lightly tap the base of the container on your counter to settle larger bubbles, then swirl the milk before pouring.
- Pour and Enjoy — Layer the foam over your brewed coffee and enjoy that smooth, creamy finish.
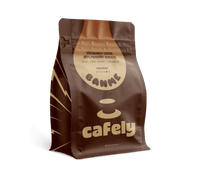
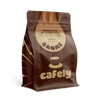
For this method, try it with DaLat Coffee, a smooth, low-acidity roast that balances beautifully with the creamy texture of French press foam.
Frothing Without Tools: Whisk or Jar Method
No frother or French press? No problem.
These two milk frothing methods prove that anyone can create decent foam with just a bowl, a whisk, or a jar from your kitchen cabinet. You won’t get microfoam-level perfection, but you will get solid froth that elevates your coffee.
1. Whisk Method (Manual Frothing)
This method mimics the action of a frother, using good old-fashioned arm strength.
- Heat Your Milk — Warm milk in a saucepan or microwave-safe container until it’s steaming (about 150°F), but not boiling.
- Transfer to a Bowl — Pour the hot milk into a wide, heat-safe mixing bowl to give yourself room to whisk.
- Whisk Quickly Back and Forth — Use a handheld whisk and move vigorously in a back-and-forth motion (not circles) for about 1 to 2 minutes.
- Watch the Foam Form — As the air gets incorporated, you’ll see froth start to build on top.
- Spoon the Foam onto Your Coffee — Pour the milk, then spoon on the foam for a textured, creamy finish.
2. Jar Method (Shake-and-Froth)
This one’s as low-effort as it gets. Just a jar, a lid, and some movement.
- Warm the Milk — Microwave or heat the milk on the stove until hot but not boiling.
- Fill a Heat-Safe Jar Halfway — Only fill halfway to leave room for the foam to expand.
- Screw the Lid on Tightly — Make sure the lid is secure to prevent spills.
- Shake Hard for 60 Seconds — Hold the jar with a towel and shake vigorously. The milk should nearly double in volume.
- Let it Rest for 30 Seconds — Allow the foam to settle before pouring slowly into your coffee.
Safety Note: Be cautious when opening hot jars. Always vent steam away from your face.
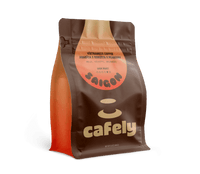
Cafely Pairing Tip: These DIY methods pair beautifully with SaiGon OG Coffee. Its full-bodied feel holds up well to thicker, denser foam, and the flavor notes of butter and roasted nuts give your homemade drink a robust finish.
Frothing Coffee Alternatives: Creamers and Specialty Blends

Frothing milk is a fantastic way to elevate your coffee, but some mornings are too rushed for warming milk, cleaning tools, or following steps. If you’re looking for that creamy, foamy texture without the extra effort, Cafely’s specialty instant blends are the perfect shortcut.
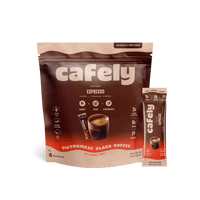
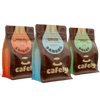
Cafely’s Vietnamese Coffee 2.0 products are crafted with premium robusta beans and high-quality creamers (dairy or coconut-based) that froth naturally when whisked. The balance of fat and emulsifiers helps create a stable foam layer, even without steamed milk.
Because the milk component is already integrated into the powder, there’s no need to froth separately. You activate it with water and a quick whisk. That means no messes and a lot fewer tools than other methods.
1. Vietnamese Coffee 2.0: Instant Milk Latte
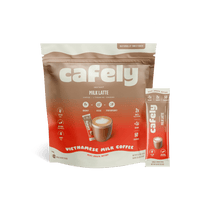
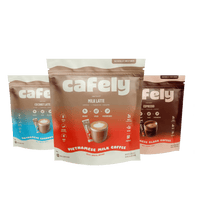
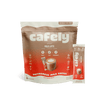
Cafely Vietnamese Instant Milk Coffee is a rich, smooth instant latte that blends premium Vietnamese robusta with sweetened condensed milk. It’s designed to create that creamy, layered texture without needing to heat or froth milk separately.
Here’s how to make the perfect instant milk latte:
- Empty the Sachet into Your Cup — Each packet contains the ideal balance of bold coffee and creamy sweetener.
- Add 6 to 8 oz of Hot Water — The water should be just off the boil (around 90 to 95°C or 194 to 203°F).
- Froth or Whisk for a Few Seconds — Use a handheld milk frother or a simple whisk to create instant foam on top. (10–15 seconds is perfect.)
- Sip and Enjoy — You’ll get a smooth, balanced, café-style milk coffee in under a minute.
This option is perfect for work-from-home mornings, busy parents, or anyone who wants high-quality Vietnamese coffee without brewing or blending.
2. Vietnamese Coffee 2.0: Instant Coconut Latte
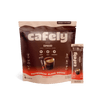
If you’re looking for a dairy-free morning coffee latte, Cafely Vietnamese Instant Coconut Coffee brings a tropical twist to your foam game. It uses the same robusta base as the milk latte, but replaces dairy with creamy coconut milk powder. This lactose-free option creates a sweet, nutty layer of flavor that froths up beautifully.
Here’s how you create a delicious cup:
- Pour the Contents of the Sachet into Your Mug — Each serving includes robusta coffee and coconut milk powder pre-mixed for convenience.
- Add Hot Water (6 to 8 oz) — The coconut creamer activates instantly with hot water. No need to heat milk separately.
- Froth or Whisk Briefly — Use a handheld frother or whisk to aerate the coconut milk blend into a light foam layer.
- Top it Off With a Sprinkle of Spice — A perfect dash of cinnamon or cocoa powder pairs beautifully with the coconut flavor.
Bonus Foam Tip: Customise Your Cup
Both instant blends are fully foam-friendly, so they’ll take on extra texture if you whisk or froth them briefly after mixing.
Here are a few fun ways to customise these drinks:
- Add vanilla syrup, caramel, or hazelnut syrup before frothing to create a flavored latte vibe.
- Sprinkle cinnamon or cacao over the foam for a barista-style finish.
- Mix with ice after frothing for a chilled, foamy drink.
These upgrades take less than 30 seconds, turning your instant coffee into a luxury experience.
FAQs: How to Froth Coffee
Want to learn more about coffee foam?
Check out the answers to the frequently asked questions below, or head over to the Cafely Blog:
1. What Milk Is Best for Frothing?
Whole milk creates the richest, creamiest foam due to its higher fat content. You get a similar feel from oat milk, too.
2. Can I Froth Milk With a Blender?
Yes, you can blend warm milk on high for about 30 seconds for quick froth.
3. What Common Mistakes Should Be Avoided When Frothing Milk?
The most common mistake is overheating the milk. Going above 150°F can scald the milk and ruin the texture. Keep it just under boiling.
4. Is It Better to Froth Cold or Hot Milk?
It’s better to froth warm milk (around 130 to 150°F). Cold milk won’t foam as easily.
5. Why Is My Milk Not Frothing?
It could be too hot, too watery, or lacking enough protein or fat.
6. Can I Use Powdered Milk for Frothing?
Yes, just make sure it’s mixed thoroughly before frothing.
7. Is Boiling Milk the Same as Frothing?
No, boiling burns the milk and destroys its ability to hold foam. You won’t have either the creamy texture or the delicious taste that frothy milk adds to coffee.
8. Why Is My Milk Bubbling Instead of Frothing?
Bubbling milk usually means you’re moving too fast or not angling your frother correctly.
9. Why Does Frothy Coffee Taste Better?
Foam adds a creamy mouthfeel and naturally enhances sweetness and aroma.
10. Can You Whisk Milk To Make It Frothy?
Yes, just heat it first and whisk vigorously for 1 to 2 minutes.
